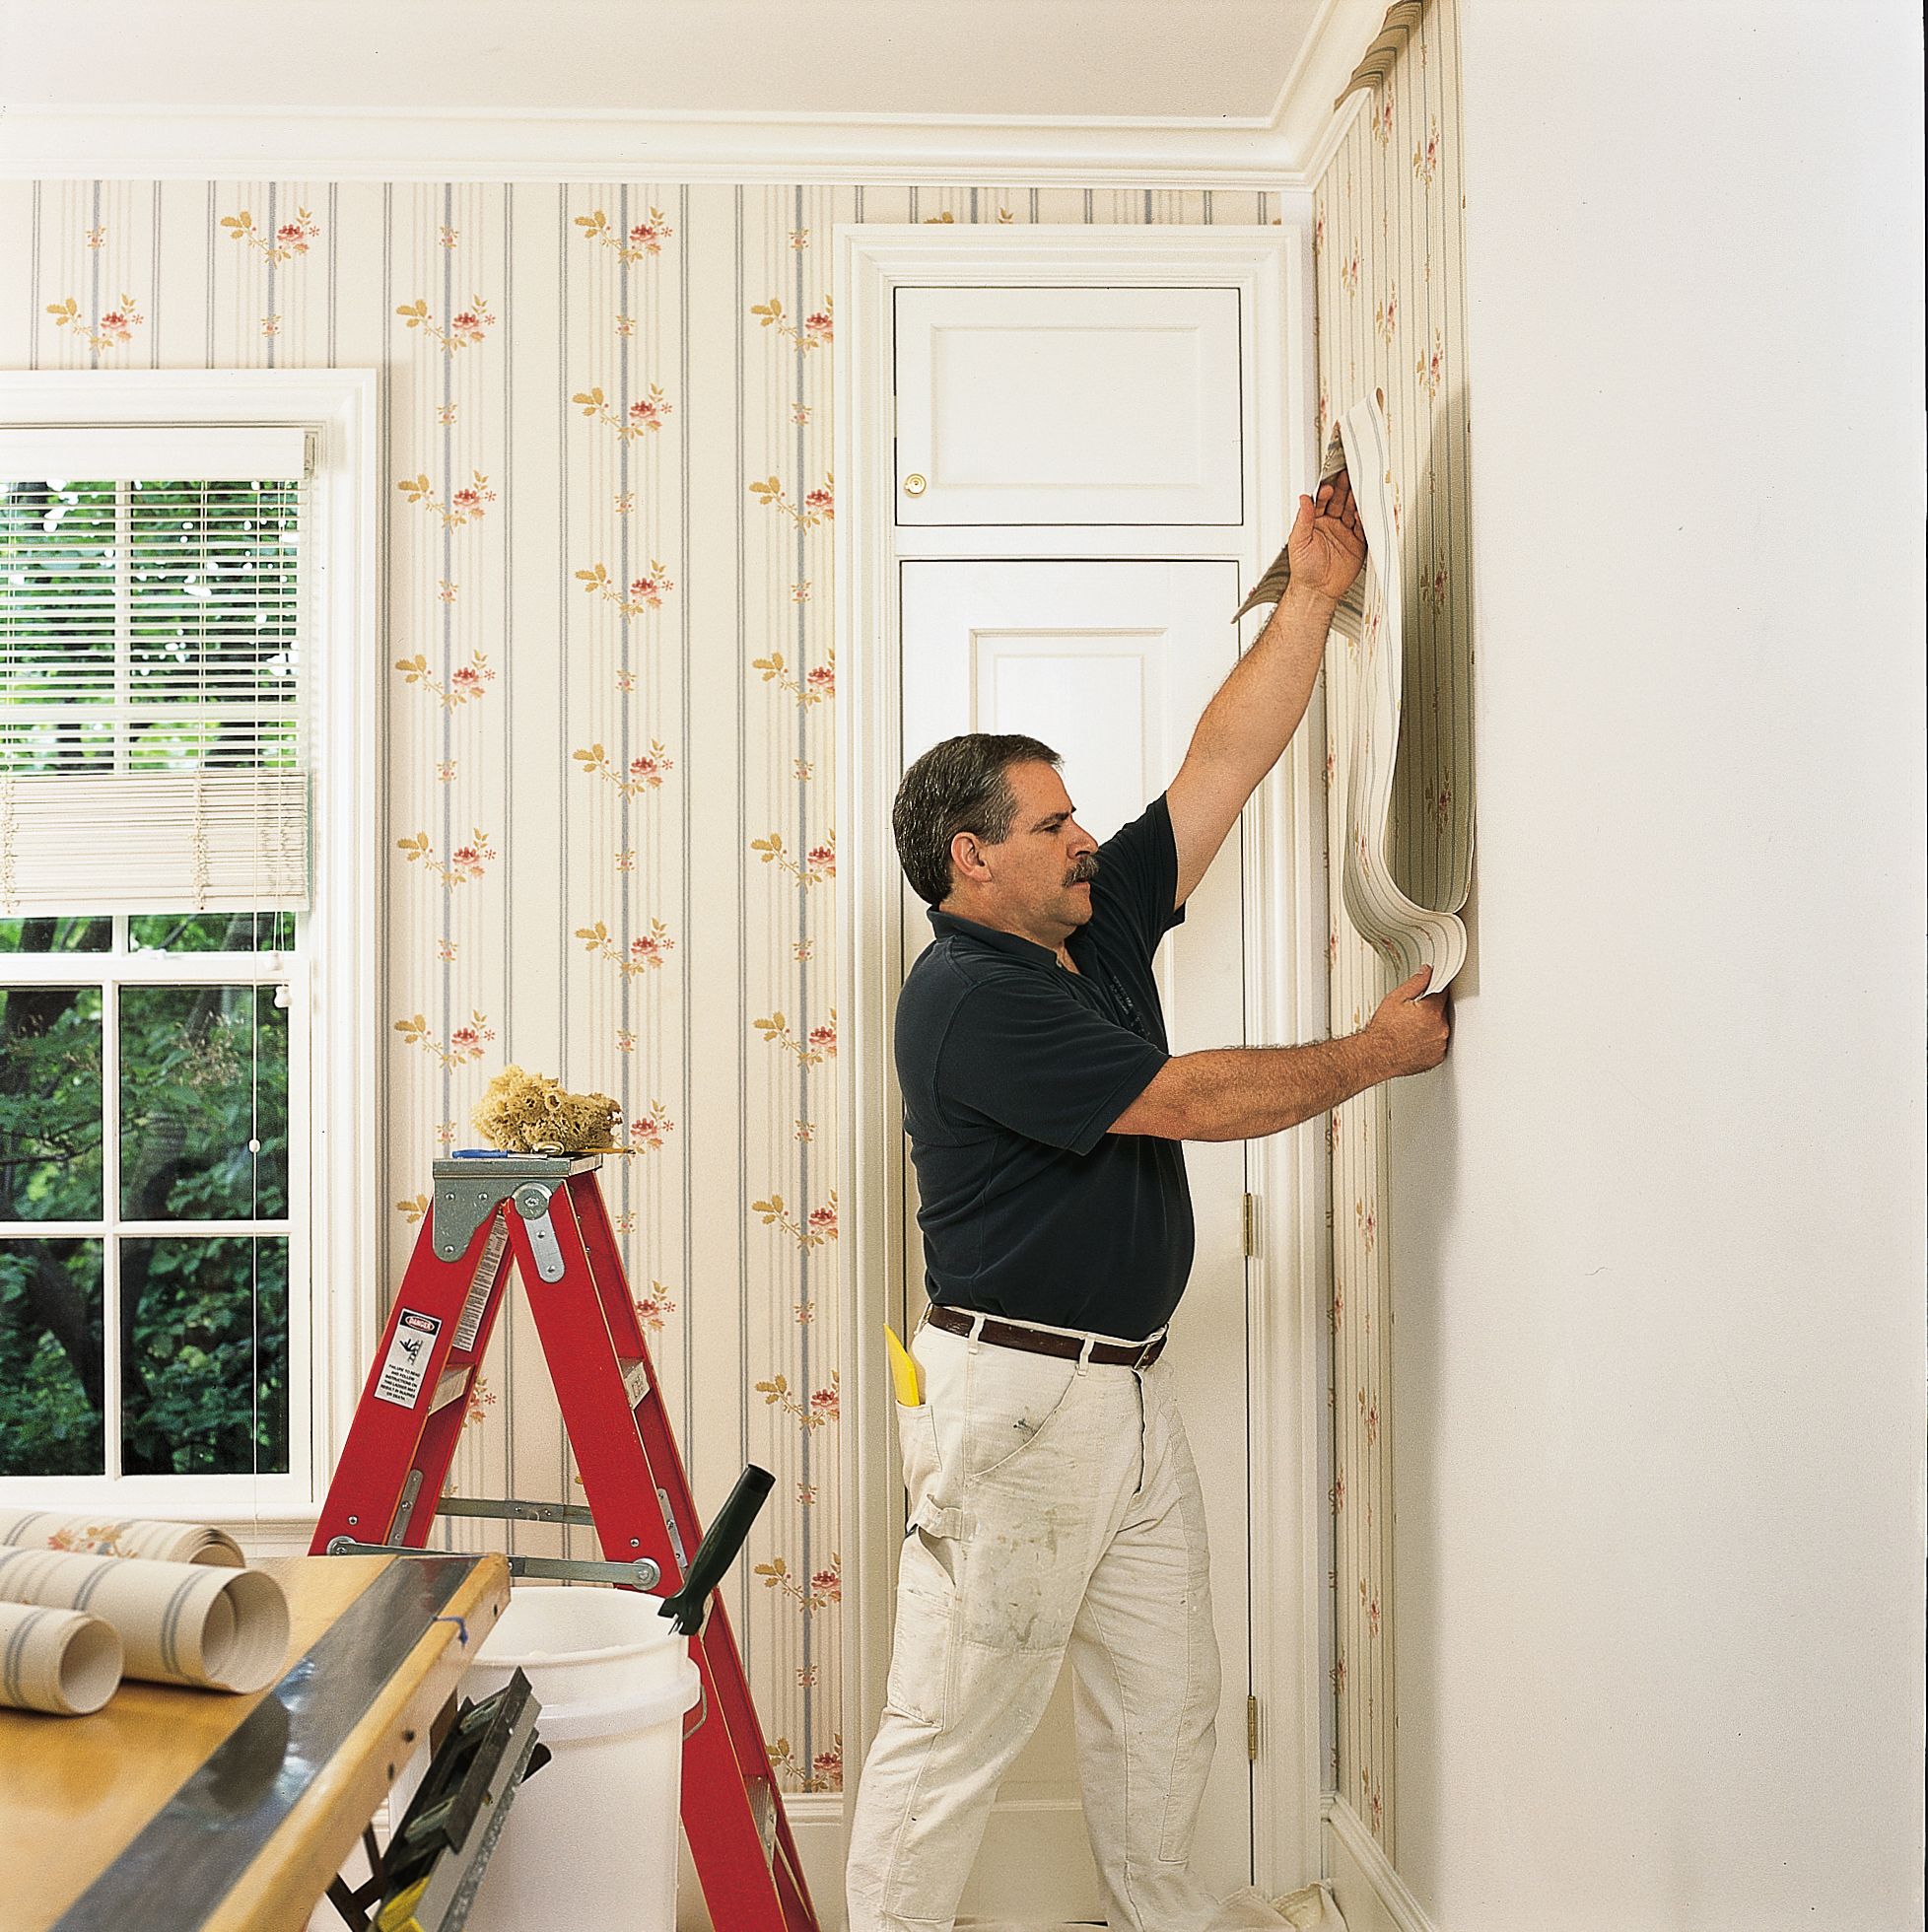
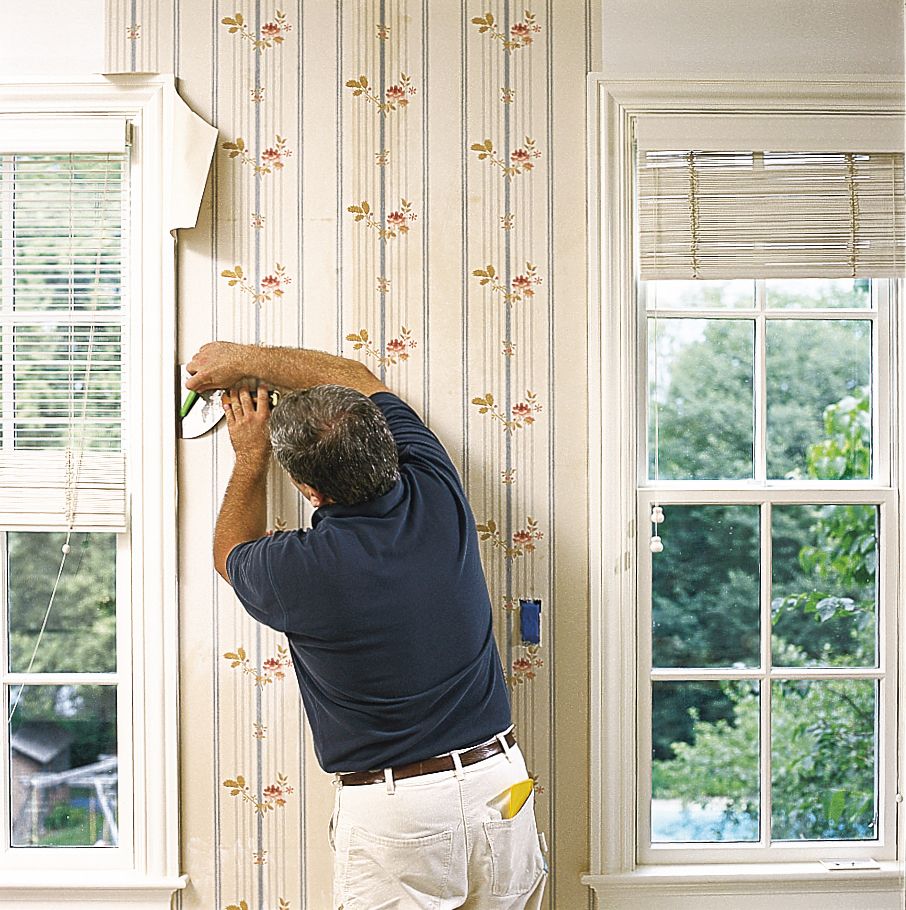
 A man putting up a strip of wallpaper in front of a red ladder." />
You don't need to be a contractor to hang your own wallpaper. Follow these step-by-step instructions for professional-looking results.
A man putting up a strip of wallpaper in front of a red ladder." />
Hanging your own wallpaper may seem daunting, but with patience and precision, you can achieve professional-looking results. Our guide will walk you through the steps with the help of John Dee, a long-time painting and contracting expert in Concord, Massachusetts.
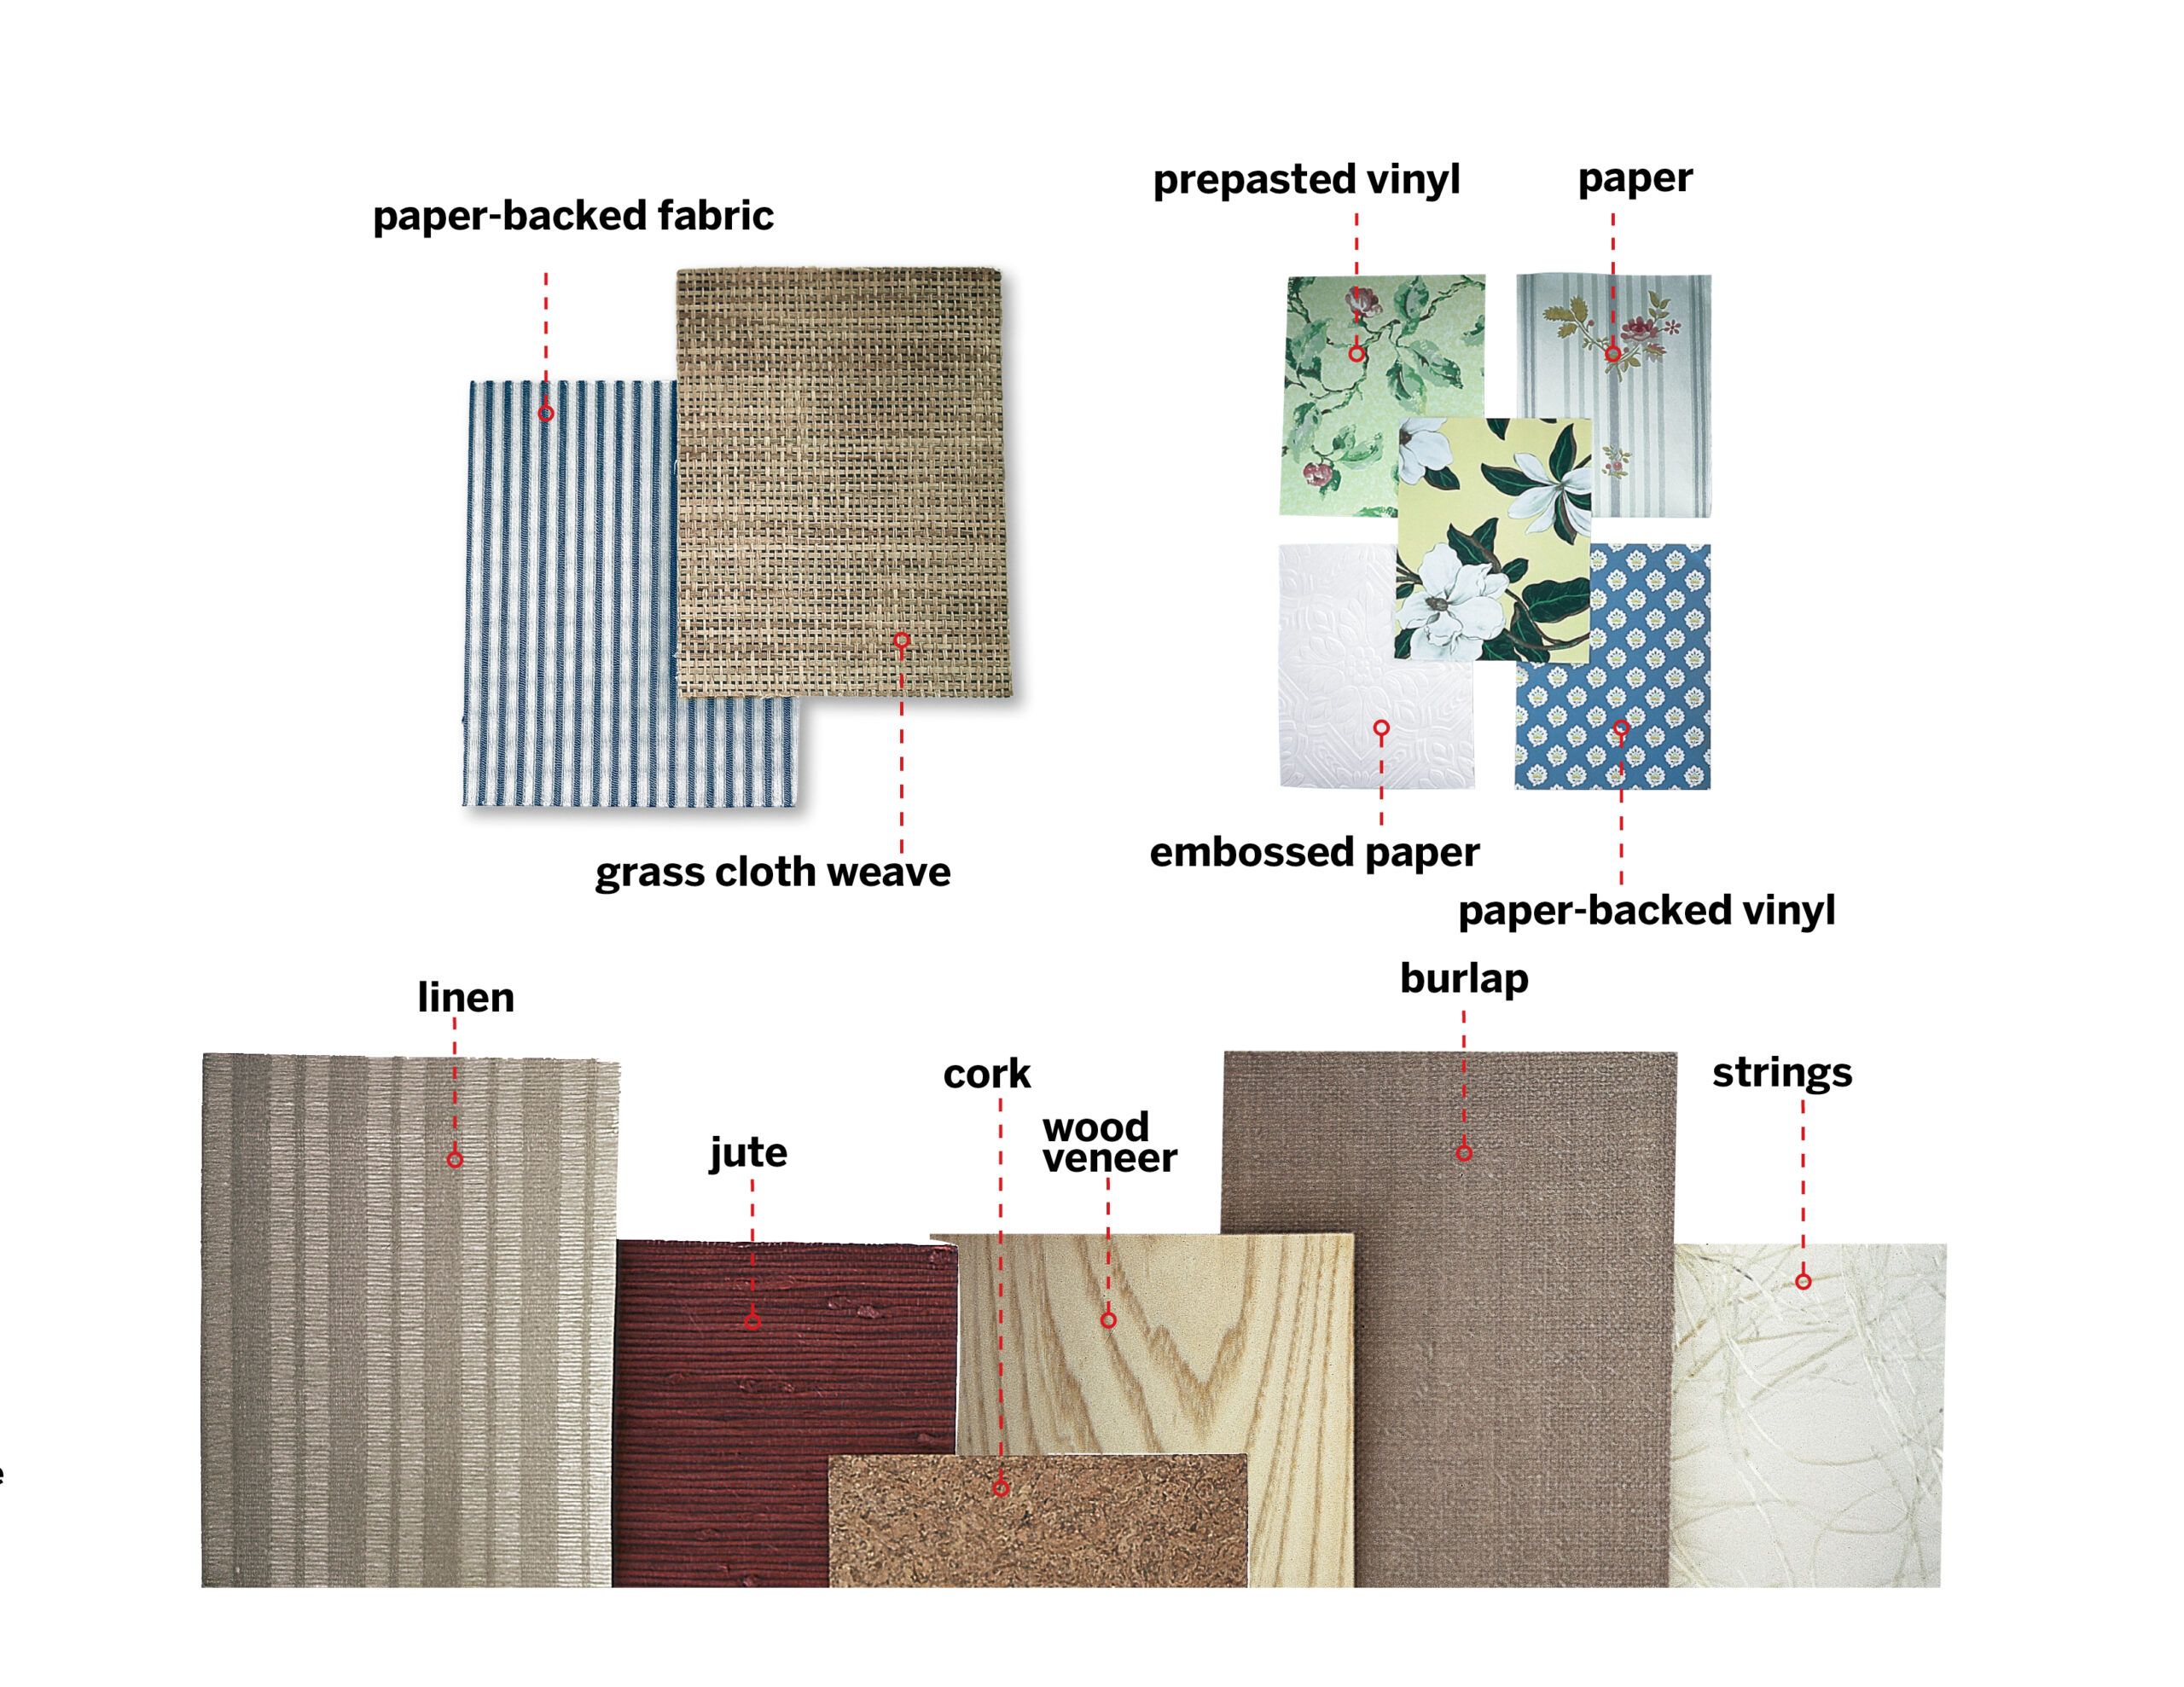
Different types of wallpaper have unique characteristics that affect installation and durability. Here are some of the most common wallpaper options and materials you’ll need to choose between.
Pre-pasted wallpaper comes with adhesive already applied to the back, which is activated by water. This type is generally easier for beginners as it eliminates the need to apply paste manually. Simply soak the paper in water, fold it over onto itself, and hang.
Non-pasted wallpaper requires you to apply adhesive yourself, offering more control over the process but demanding additional skill and time.
Vinyl wallpaper is the most common type sold in the United States. It’s durable, easy to clean, and resistant to moisture, making it ideal for bathrooms and kitchens.
Paper-based wallpaper, while more delicate, offers a wider range of designs and textures. It’s also easier to cut than vinyl.
For those seeking unique aesthetics, specialty wallpapers like silk, grass cloth, and textured options offer distinctive looks. These materials require extra care during installation and often come with a higher price tag, but the results can be stunning.
Wallpaper costs vary by type. It’s generally sold in rolls that cover between 30 and 60 square feet. Cheaper rolls can cost as little as $30, while more intricate patterns can range upwards of $150 per roll. Consider one of our most recommended wallpaper options when making a purchasing decision.


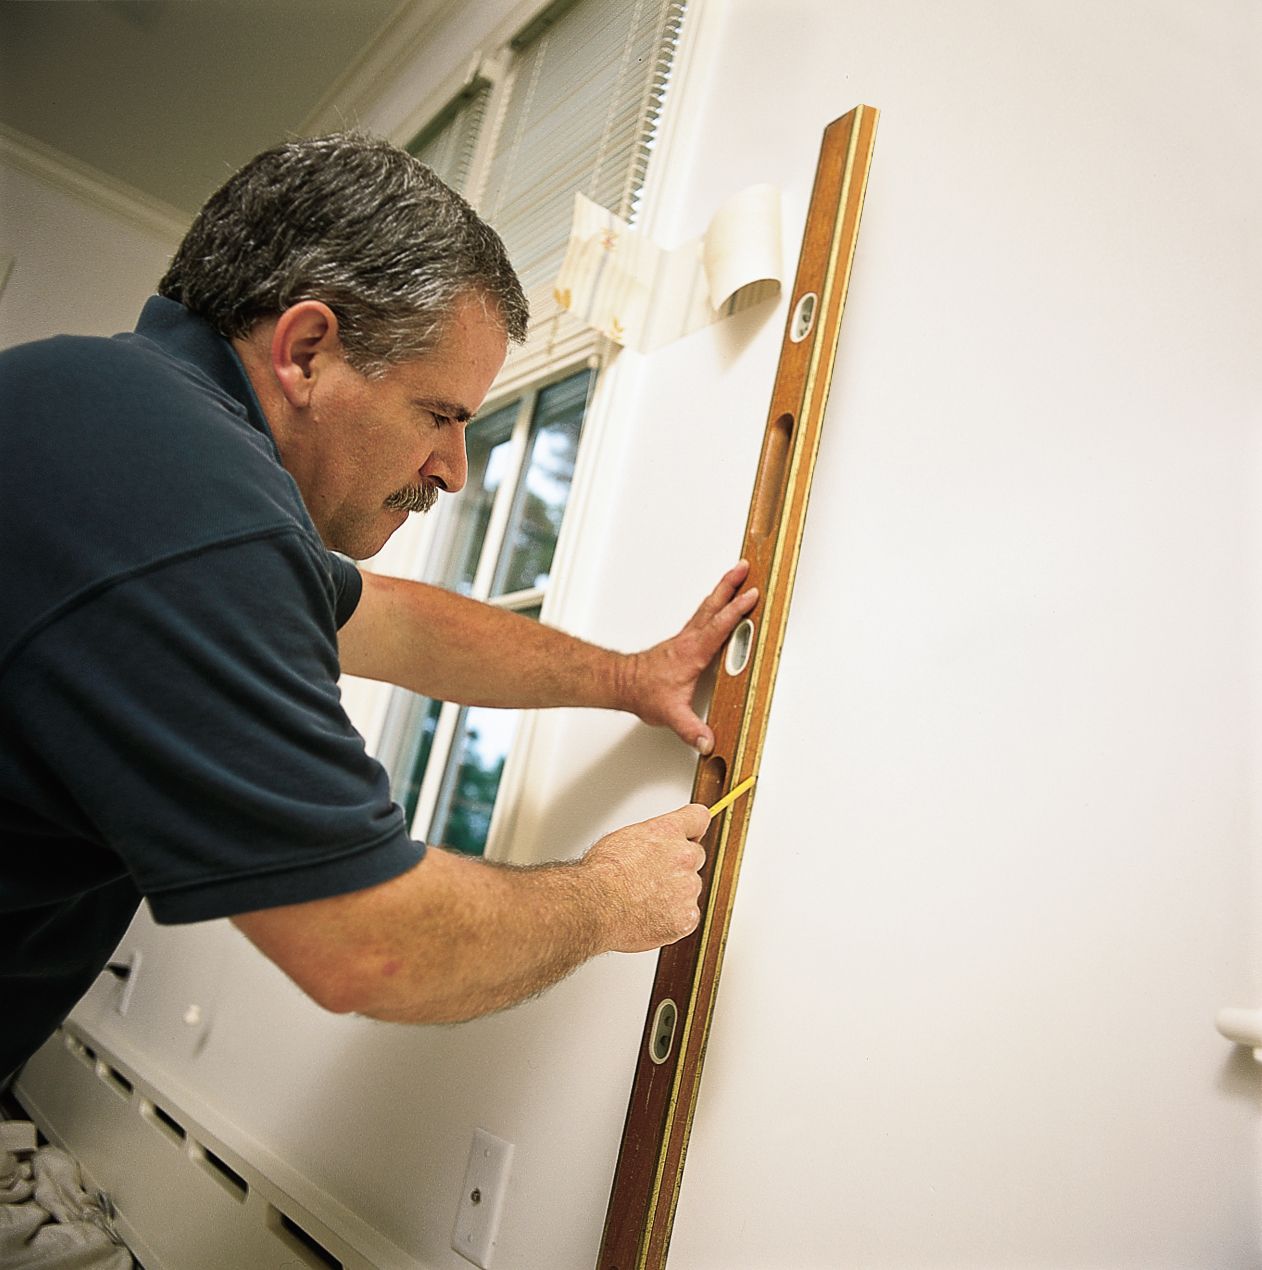
The first thing to do is plan how the wallpaper will be installed. If your wallpaper has a dominant design element, be sure to center it on the “focal wall”—the wall people first notice. Measure the width and height of this wall and mark its midpoint.
Cut a short strip of wallpaper. Place the dominant element over the midpoint. Mark the wall at the paper’s leading edge (the edge against which the next strip will hang).
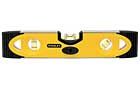
Using a 4-foot level, draw a plumb line at that mark.
To estimate seam locations around the room, cut two more short pieces of paper and paste them edge-to-edge on the wall.
Mark where each leading edge meets the wall. Continue marking around the room, pulling up and re-adhering the strips. Measure the wall height at the plumb line.
Cut the first full-length strip, with as much overhang as needed to place the dominant element at the midpoint mark.
If using solid-color wallpaper, leave 1 inch of overhang at the top and bottom.
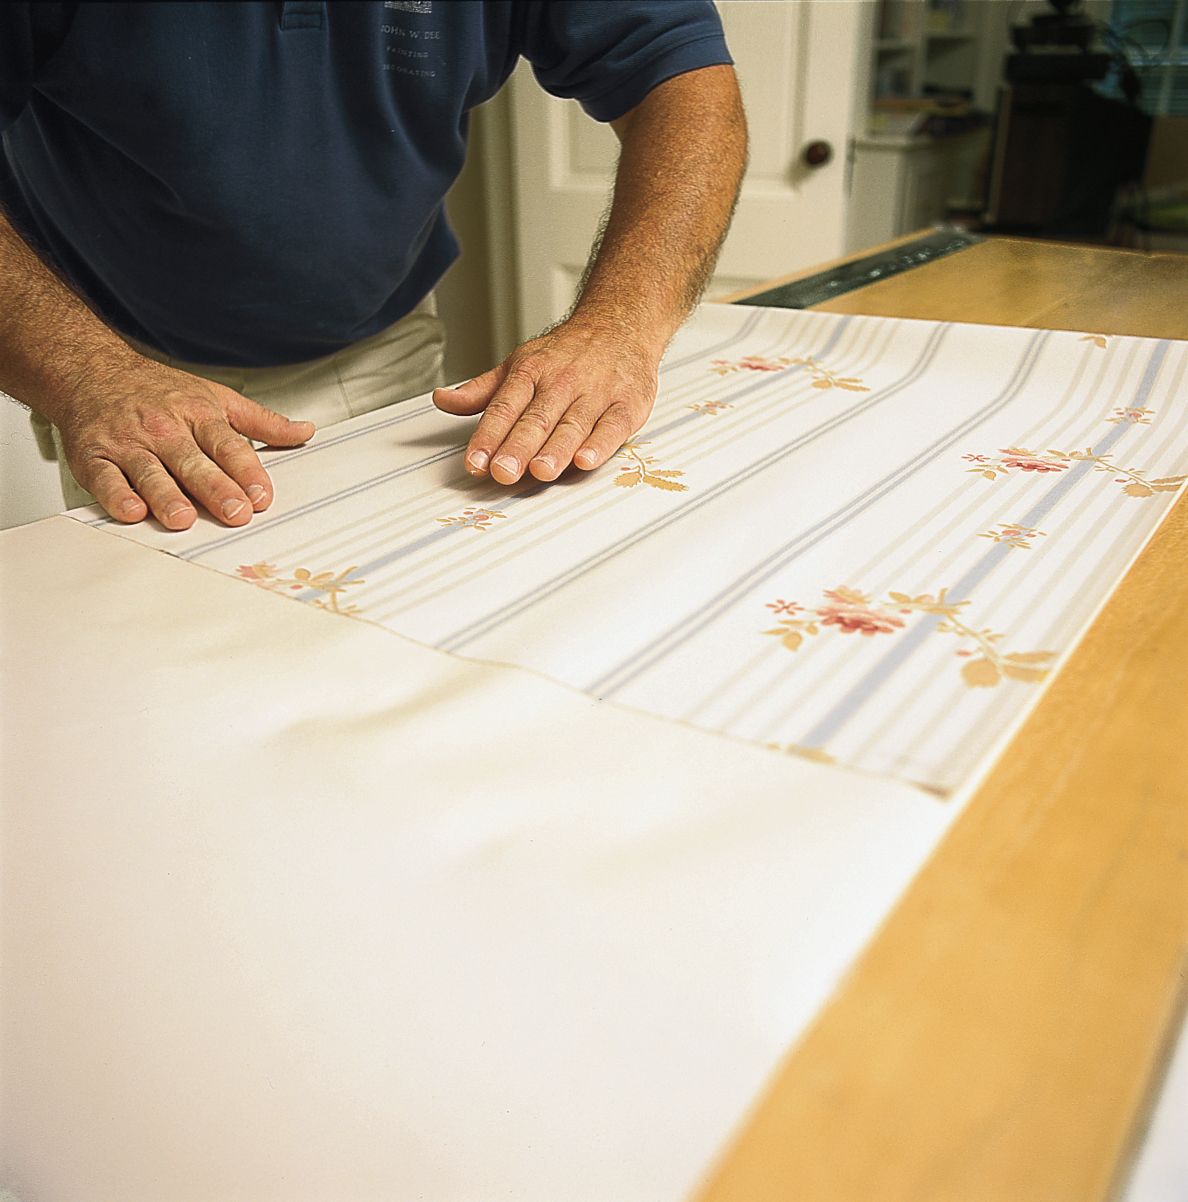
If the paper is not pre-pasted, roll out the first strip face-down on a 6-foot-long work table and use a 3/8-inch-nap paint roller to apply a generous, even coat of paste all the way to the paper’s edges.
To give the adhesive a chance to activate, gently fold over both ends of the strip, being careful not to crease the paper, so that they meet in the middle; this process is known as “booking.”
Make sure the paper’s edges are exactly aligned so that no pasted surface is exposed. Let stand for 3 to 5 minutes before hanging.
For pre-pasted paper, loosely roll up a strip with the adhesive side out and immerse it in a trough of cold to lukewarm water, depending on the manufacturer’s instructions, just until the paper is thoroughly wet (but no longer). Book the paper as above for 3 to 5 minutes.

Take the booked strip to the wall, then unfold and apply the top half, aligning one edge with the plumb line in Step 2.
For solid paper, overlap the ceiling (or crown molding) by 1 inch. Overlap a patterned paper as needed so that the main design element is centered on the midpoint of the wall section.
Next, smooth the edges of the paper with a damp sponge, then brush lightly from the center of the strip to its edges. Gently pull (do not push) a smoother across the paper to eliminate wrinkles and anchor the paper to the wall.
Unfold the strip’s lower half. Align and smooth it as above, overlapping the baseboard as needed.
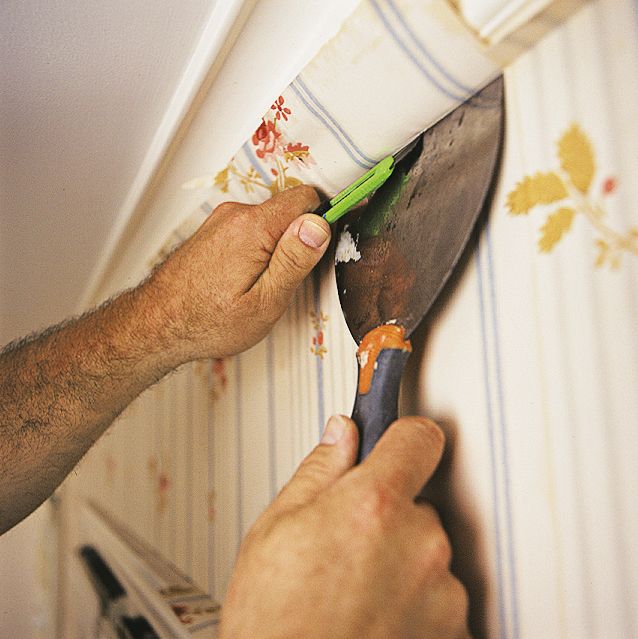
Trim excess paper with a sharp razor knife held almost parallel to the wall. Guide the blade with a 6-inch putty knife to prevent tearing.
Wipe any adhesive off the paper’s face with a wet sponge, pushing lightly toward the edges. Then sponge-clean the woodwork and ceiling.
Measure, cut, and hang each subsequent strip, sliding them up or down on the wall to align the pattern and to butt seams tightly with no overlaps.
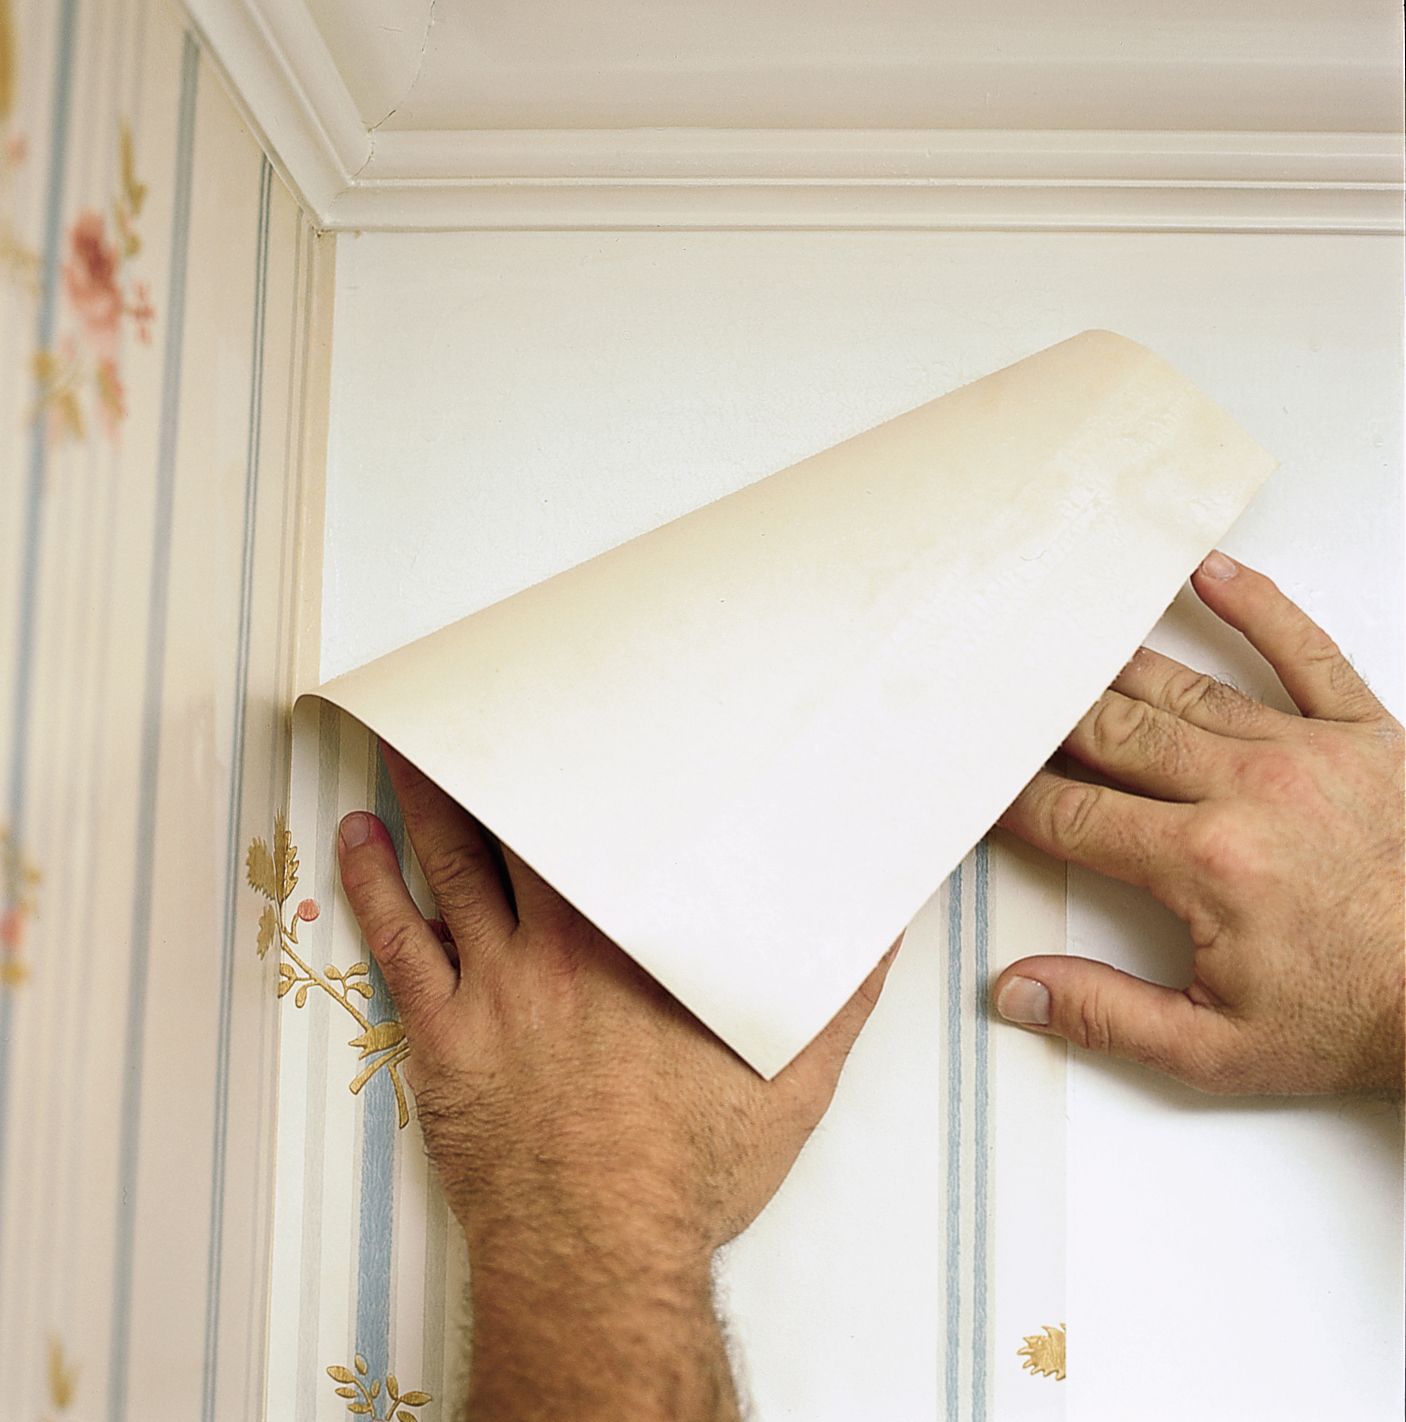
Corners are the only places where strips overlap. For an inside corner, measure from the corner to the top, middle, and bottom of the last-pasted strip. For out-of-plumb walls, add 1/8 inch to the largest measurement.
Using a level, trim a dry strip to that width, cutting the edge that’ll meet the corner. Hang the paper so the just-cut edge turns the corner and extends onto the adjacent wall.
Position the adjoining strip with its edge inside the corner, overlapping the previous strip; align the patterns.
Mark where the leading edge lands and draw a plumb line. Using the line as a guide, hang this strip.
For outside corners, trim the strip to wrap over the next wall by ¼ inch.
Hang the next strip so it overlaps the previous piece but lands short of the corner. This prevents the paper from peeling if someone brushes against the corner.
When applying paper to walls adjacent to windows and doors, allow the leading edge of the strip to overlap the trim.
From the paper’s waste edge to the corners of the trim, make diagonal cuts with scissors to allow the paper to lay flat on the wall.
Remove the bulk of the overlap with scissors. Smooth the paper as in Step 4, then use the smoother to push the paper snugly against the casing, the ceiling, and the baseboard.
Trim off any remaining overlap.

To trim around a window’s stool and apron, make a series of short cuts from the waste edge of the strip toward the corner where wall and stool meet. These narrow fingers of paper allow the strip to be shaped to the profile of the casing.
With a narrow putty knife, hold the paper on the wall and trim any waste with a razor knife.
To hang headers and footers—the paper above and below windows and above doorways—measure, cut, and book each strip as you go. To keep these shorter pieces plumb, align each strip’s lead edge with a torpedo level.
Hang, smooth, and trim as many headers and footers as needed without going past the end of the window or door casing. Then, hang a full-length strip of paper alongside the window or door by butting one edge of a dry, full-width scrap of paper against the last header or footer and marking where its opposite edge lands.
With a level, draw a plumb line on that mark from floor to ceiling. Paste, book, and hang the full-length strip, adjusting it up or down as needed until the patterns match up. When the patterns align, sponge and smooth each piece as in Step 4 and trim off any overlap.
Even with careful planning, you’re likely to encounter challenges during your wallpapering project. Here are some common problems to watch out for and solutions if you encounter them.
If you notice pattern misalignment after hanging a strip, it’s best to address it immediately. Carefully peel back the misaligned strip and reposition it. For slight misalignments, you may be able to gently stretch or compress the paper to match. In severe cases, you might need to replace the strip entirely. Always have extra wallpaper on hand for such situations.
Small bubbles can often be smoothed out with a plastic smoother or damp sponge. For larger bubbles, make a tiny slit with a razor blade and smooth out the air. Be careful not to oversaturate the paper when smoothing, as this can cause wrinkling. If wrinkles persist, you may need to lift and reapply that section of paper.
Edges that lift or peel can be reattached using wallpaper seam adhesive. Apply a small amount under the lifted edge with a thin brush, then press the edge back into place. Wipe away any excess adhesive immediately. For persistent lifting, especially in high-humidity areas, consider using a stronger adhesive.
Proper maintenance can extend the life and beauty of your wallpaper. Different types of wallpaper require different care approaches, and knowing how to address minor issues can prevent them from becoming major problems.
For vinyl wallpaper, regular dusting with a soft cloth or vacuum brush attachment is usually sufficient. You can clean more thoroughly with a damp sponge and mild soap solution when needed. Be careful not to oversaturate your wallpaper.
Paper-based wallpapers are more delicate and should only be dusted or very gently cleaned with a dry sponge. Always test any cleaning method in an inconspicuous area first. For textured or specialty wallpapers, follow the manufacturer’s specific cleaning instructions.
Learning how to perform wallpaper repairs can save you money vs hiring a professional. Small tears or lifted seams can often be repaired with wallpaper seam adhesive. For scuffs or marks, try using a wallpaper eraser or a very gentle cleaning method appropriate for your wallpaper type.
If you need to patch a damaged area, save leftover wallpaper for this purpose. Match the pattern carefully and use a sharp blade to cut a patch slightly larger than the damaged area. If you’re dealing with a particularly challenging area, consider how to sponge paint a wall as an alternative decorative technique that can complement your wallpaper.
In the video below, painter Mauro Henrique demonstrates how to strip wallpaper.
While you can do most wallpaper maintenance yourself, some situations may call for professional assistance. If you’re dealing with extensive damage, mold, or if your wallpaper is a high-end or delicate material, it’s often best to consult a professional.
Hanging wallpaper is a rewarding DIY project that can significantly enhance your home’s look and feel. By understanding the different types of wallpaper, using the right tools, and following best practices for preparation and application, you can achieve professional results.